Sunday, June 17, 2012

Jumpers - just a little daggy!

In theory, these are the perfect jumpers for me. The colours are pretty, the style is perfect for layering under my new coat (most of the jumpers I have have interesting necklines and  just don't look right when the buttons of the coat are closed. Like this or this.) These new jumpers sewed up pretty good too, since they are just like a t-shirt. But without any interest, the are even boring to me and I like dressing simply.

The red is possibly some type of wool blend. I bought it 10+ years ago when I was at university and like travelling to fabric stores all over Brisbane. This particular place was in someone's garage, I swear. I think this was the only piece I actually bought at the time because I wanted to visit some other places in the area. The pattern is a vintage Kwik Sew pattern, 742 but I omitted the turtleneck (they say cowl neck) and added a self-fabric neckline.


The red version wasn't scooped enough, so my second version was scooped a little more with the Jalie 2806.

Maybe they will grow on me.

Friday, June 15, 2012

The 60s style coat - part 2: the one with the confession

I had also planned to use the lining material for the under collar but then because the lining fabric is so thin and fragile and a pastel colour that a different fabric would be more suitable. The idea about using the lining was to tackle the bulk/turn of cloth issue, so I needed a thin-ish fabric. Lucky I have a stash because I found a black herringbone weave wool blend that was perfect. Hopefully I have enough to still  use that wool for its intended use (pants) otherwise I might have to see if there is more at my local fabric store.  For turn of cloth, I removed about 1.2mm from the outer edge of the collar and 6mm from the edge that adjoins the collarband. The undercollar sits under nicely now that I have stitched-in-the-ditch around the collar/collarband seam. That seemed to stop it from puffing out and showing.

 
Since my sewing machine would not sew buttonholes through two layers of my thick boiled wool, I decided bound buttonholes would be the way to go. I did an average job on the front using Gertie’s windowpane method but made a right mess on the back. I got freaked out again and had the “bright idea” of cutting holes straight into the fabric and not doing proper window method with the square of fabric. Umm, bad move. Not only did the fabric want to stretch out of place, it wasn’t in the right position after all so I had to make the holes even longer. I nearly cried at my stupidity but managed to make it a little more presentable when I stitched the facing to the backs of the buttonholes. I really need to practice how to do the marking for the windows on the facing or try a different method or something because this is the second time I have had the experience of them not lining up.  I am thinking of doing bound buttons on my next blouse or skirt project so I can practice this skill. I think I also need to invest in some silk organza. Does anyone is Australia know of a good source?


I also had some difficulty attaching the lining. The fabric shell seems a lot longer than the lining. I attributed this to the boiled wool having more give than the lining. I had to ease the wool into the lining at times, but it all lots extremely smooth. I managed to rip a thin hole along the seam line when I was impatient with the unpicking, but I darned that area and sewed around it. Hopefully it will not be too fragile at this point.
For the hems and sleeves, I stitched in the ditch to tack the hems down, as well as some a couple of stitches here and there to stop the wool from moving. Since it was a knit, it likes to stretch.
The coat has managed to come together despite some difficulties. I experienced more drama than any other sewing project but I will wear it and that is all that matters to me at the moment.


Saturday, June 09, 2012

The 60s style coat - part 1

This project turned into a mojo killer. Perhaps it was the uninspiring colour. Maybe it was because I was so unorganised with the lining, buttons and notions that more than once I had to stop to purchase interfacing or buttons.  I know that it was a bigger project than I had anticipated. I forgot how time consuming coats/jackets can be. Sew some seams, stop and press those seams. Press the stitching, press it open on the inside, press it open on the outside. I would have to turn the iron on each time, as I don’t trust myself to remember to turn it off before I leave the house. The chances of a fire are slim, but I don’t like the idea of leaving appliances like that on.

The pattern is Burda 111-09-05. I have used before in a boucle.  It was a close call between that and pattern120-12-08 . On my list were pockets, collar with not lapels, set in sleeves and about 65cm in length. Each pattern has a few features from my list. I did consider morphing the patterns, and layed the traced pattern over the other coat’s pattern sheet but then laziness set in and I just decided to extend the older pattern and had the pockets from the other pattern. I decided I could live with the raglan sleeves and besides, they are way easier to sew in!
I lengthened the pattern by 10cm, as this is what I felt my boucle version was short by. I was going to sew the pockets in the lining fabric to reduce bulk, but then I remembered my current coat which has self fabric for the pockets and it is snugly warm to shove my fingers in on playground duty. The fabric I used is boiled wool. I thought I was ordering something pants weight and I don’t know whether the fault was mine or the ebay sellers but this has been sitting in my stash waiting to be sewn for a couple of years. I have discovered that boiled wool is perfect for in light showers, as the day we visted Cooly Rocks On to see the hot rods, there was numerous showers and the water stayed on top of the coat.

I will add some more detailed shots for part 2.

Sunday, May 13, 2012

A shirt for my boy - Kwik Sew 1190

I have been sewing a fair bit for my daughter lately. I never got around to blogging them, but she has had a few pairs of leggings and some dresses made for her. Anyway, the boy needed a good shirt or two and he was finally big enough to try out the vintage Kwik Sew shirt pattern I had picked up when he was young from the op-shop. Back when the op-shops around town actually sold patterns and buttons and other sewing bits and pieces. Now many of those op shops have closed or culled their craft section.

 This pattern features a seperate collar and collar stand, a front placket, back pleat, yoke at shoulder and cuffs complete with sleeve slit. Usually I would lean toward using an Ottobre pattern but Otto just doesn't seem to do shirts properly. This pattern uses 6mm seams, with 3mm seams at the slit. The fabric is actually a brown and white striped  winter weight cotton fabric.
When I finished this the other week, I was glad to see the end of it. It really was not my best sewing - I made a heap of mistakes. The process  for the slits  (sew facing piece with 3mm seams, then flip and topstich the other side) ended up showing the unfinished edge. It would have worked had this seam been 6mm, but 3mm was just to little to work with. I however only noticed after I had attached the cuffs. My remedy was to zigzag the edges. Luckily you don't really notice when the cuffs are closed up.

The other big boo boo was sewing the button hole to the wrong side of the cuff - I had even cut it open and everything. Once again you can't see it when the cuff is closed but seriously,  it was not a good sewing day.

I love love love this pattern and will make it up again, if only for the proper collar and placket. No doubt I will follow Sherry's sleeve slit method  next time and while this may result in having to change the cuff length, I would rather that then the exposed seams that I experienced.

Monday, April 30, 2012

My image cowl top

I bought the Winter 2011/2012 issue of the My Image sewing magazine after seeing Melissa from Fehr Trade's version. I had made a few muslins of  different cowl top patterns looking for the one but since Melissa was so positive, I thought it was nearly worth making a wearable top straight away. I did choose to cut into this skin tone, not a great colour but with a lovely hand cotton lycra, because I wasn't sure about the sizing, as it is a lot smaller in the waist then my Jalie patterns.

 It turned out awesome. Extremely quick too, being only a knit top.


The back view shows less wrinkles there than normal. Maybe I need to try reducing the waist ease on my other tees. The shoulders are a little wide,so I will make an adjustment for next time.

This photo is just me playing with new settings on Picasso. I took the photos before work so never got anything else than a hands on the hip shot.

Friday, April 20, 2012

Burda 125-10-2009 - I think I am on to a winner!


I had the help of Steph. She drafted up a pants block and showed me how to tweak it to produce a better pants pattern. Let’s just say she was very patient in dealing with me. I can certainly recommend her pants block service. Just don’t be like me and jump to the wrong conclusion. It will certainly not help with the email communication.


I chose this pattern because it worked well with the requirements of Steph’s simple pants pattern. My usual pants patterns have yoke/waistband. But then agin, the Jalie patterns I use have a straight waistband so this is like the best of my favourite patterns. I had to change the waistband to a curved on when I tried on the pants with the waistband. There was just too much ease there and it was not a good look.

My main issue with fitting pants was the rear view. There was always these lines under the butt. Not a great look. These are gone with the adjustments that I had to make.Woohoo. It is a little baggy back there, but I put that down to using a very stretchy wool blend fabric. I had no idea how much stretch there was when I selected the fabric to use for the first-after-fitting-the-muslin. I had to take in the waist significantly because of the stretch factor.

 These pants are so comfortable. I can't wait to wear them to work.

Tuesday, April 10, 2012

Shirts - fine at the front, funky at the back

You know, this is the first time I have ever made a long sleeve shirt. The few short sleeve shirts get worn regularly to work but I have always made long sleeve or 3/4 sleeve knits tops since they work better with layers.

This shirt is #109 from Burda 9/2005. I know, another old pattern. I have tried to warm up to new Burda patterns but they leave me cold a lot of the time. Plus I have a collection from 2005 at home ready to use all the time. So much easier that going to the library to borrow out newer copies. I chose the pattern because of the tucks and the shirt collar that is drafted ever so slightly off to the side so that the collar is not meant to button all the way up. Not a huge fan of the curved hem though but too lazy to change that this time around.

 I was surprised with the tucks - I thought they were pintucks but the pattern has you topstich 7mm away from the fold, so that is about 1.4cm per tuck. I thought that was yuge and the tucks would stick out but with a good steam press they sit beautifully. The blouse ends up extremely close fitting, so much that I had to let the sides out a little. In the future, I would only make the tucks this big if I was using a stretch woven. Otherwise it will be pintucks all the way.
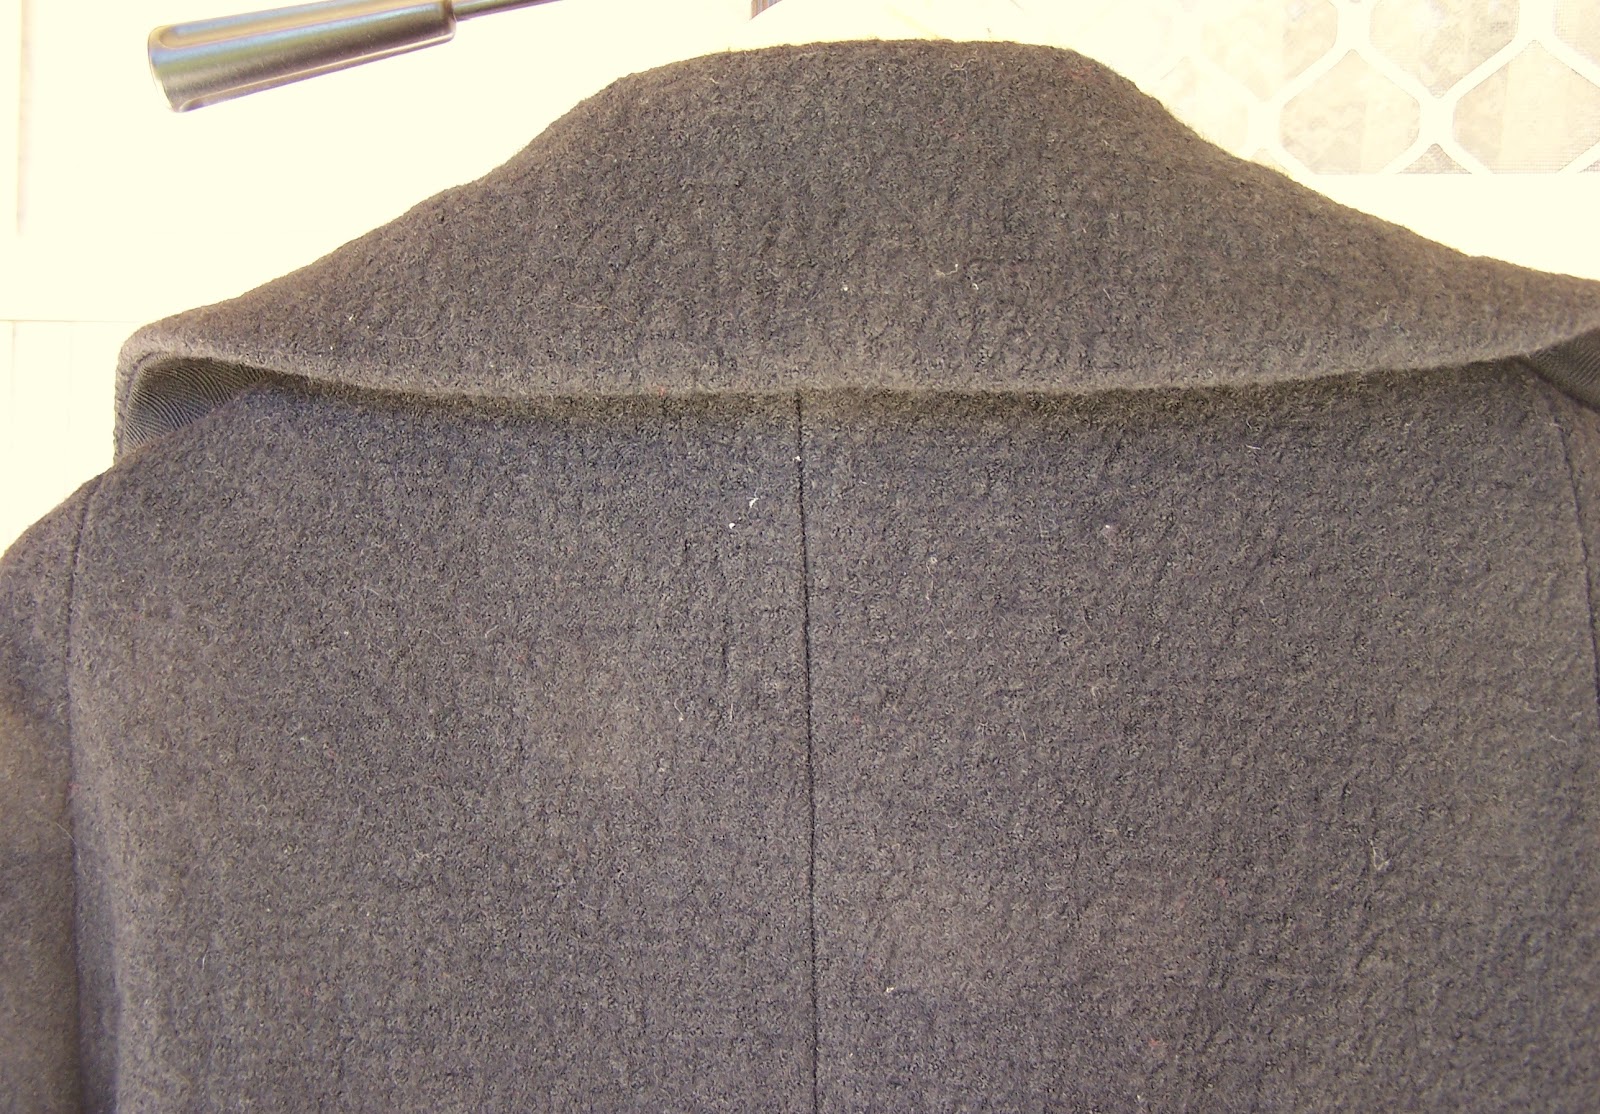
 The back looks terrible. I am pretty sure it is because it is probably too tight on me. The fabric above the tucks just puffs out. See it - yick. I will have to make the pattern again to see if making it with a little more ease will take care of the puff or whether the tucks make it do that.

 My favourite part was how crisp the front band looks. The collarband is not sewn perfect since it was really hard to see the white thread on the white interfacing. As usual, I followed Gigi's instructions. Well, without the topstitching.
 I used those intructions for the cuffs as well, though I handsewed inside.

I thought I would link in Sherry tutorial page - I used quite a few on them on my shirt (turn of cloth, continuous bound sleeve placket, block fusing,


When I saw that Suzy has the same problem as me with pooling in the back waist that a sway back does not solve, for some reason I thought I would give it another shot, using Sherry's easy way. When I hitch up my shirts at the back shoulders, it seems to work. Anway, I needed another white top for the cooler weather.
 This is a cross of Jalie 2805 and 2806 - a scooped neck without gathers and with 3/4 sleeves.
See the wrinkles again in the back - this is with the sway back adjustment of about 12mm. It does not bother me too much, but if anyone has any ideas, I am keen to hear from you.

Thursday, March 22, 2012

McCalls 5525 in purple


I have been in much the same boat as Judith workwise. The new curriculum has been kicking my butt and combined with the death of my beloved father-in-law, I haven't really felt like blogging and I certainly haven't been sewing as much.

This is what I have been working on for the past month. McCalls 5525, which has rave reviews on PR. When I saw Erica's blue version, I was in love with the pattern and went and actually bought a pattern from the store.


Anyway, the purple sateen was my test version of the pattern. Since this took many hours to complete and I have an extensive sewing to-do list, I don't think I am going to get another one made this year (as great as the pattern is). I think I ended up making view C – the short version with the shoulder flap, epaulets and back flaps. I corrected the back flap (drafted unevenly as pointed out by Erica) but missed in the reviews that I scanned that the pockets are tiny. Good thing it only gets fresh around here rather than freezing. I don't need pockets for keeping my hand warm.


I probably could have bagged the lining, but I decided to hand sew the lining in just for kicks. I used black rayon seam binding to hide the raw seam where the lining, hem and facing meet. There were only a few minor things that I changed. I decided to sew the buttons on the shoulders before sewing in the shoulder pads since I thought it would be much easier. My little tab did not get a keyhole button since my machine would not jump the jump at the collar seam so I needed to sew the buttonhole from the other way. At least there is a buttonhole there - I thought it would look a little funny without one. I used iron on interfacing rather than sew in. I used my Singer press without the steam for an easy result.

Sunday, February 19, 2012

Can't have enough pants - my cheater moment

I have been wanting to try these pants for some time. I have made the pattern up as shorts (well, long shorts) but not the full length with the flare. I love my flares. These pants have been muslined and adjusted (shifted the back legs towards the centre a la Sew-4-Fun, added length to side seams). It seemed to make a real difference at the muslin stage, but I can't see any real difference in the real thing - well, I will explain later.

Front view
 Back view
Everything was pretty much straight forward, apart from not having made pants like this for a while and stretching my brain on the waistband/fly front/pocket order and treatment. The faced yoke is a little more tricky when it comes to inserting the fly than a regular waistband - I would prefer to sew the waistband onto the pants as a whole but you need to sew it on to the front and then back and then sew the side seams later, because of the pockets.


Now, have a look at the problem I have been trying to remedy. The diagonal lines under my butt. Blah.

                                     
Well, I can correct the problem without changing the pattern I have found - I just stick my butt out a little bit. Just a little. I tend to stand with my hips tilted forward which creates all sorts of wrinkles. I am still trying to figure out if I am cheating (and just need to learn to stand a different way) because I can't seem to get the wrinkles out any other way. Any opinions?

Sunday, January 15, 2012

Tees, tees, lots of tees

A quick read around sewing blogs and you will meet many people that dislike sewing the same patterns. There are too many patterns to try apparently. Then there are others who make their TNT over many times, or are trying to, with clever variations to mix it up a little.

As I was sewing this tops,  I wondered if there were others that were like me. I sew up four very similar tops and enjoy it. I don't try to vary them too much, and I don't find it boring at all. I just enjoy sewing them without having to think to much. Am I alone, a little nigel no-friends of people who like to sew things like this?

I needed a new white tee and decided to use Jalie 2805. i have only just gotten this pattern - I thought it was time to trade in the old tee TNT for a new one. Thing is, the Jalie is virtually the same as my old Kwik Sew pattern, only a lot longer. Fabric is a delish cotton lycra.

This is Jalie 2806. I picked out the cream with brown scribbles fabric (a rayon elastane) because it was there and I could use the white thread that was in the overlocker from the white tee. I went with the 3/4 length sleeves as not to have fabric go to waste.  As soon as I tried this on, I was in love. This is my new fave tee pattern. I am surprised  I like the scoopneck as much as I do. It is not a wide scoop, I think that is why I like it so much.

Jalie 2806 again, this time in a bright yellow cotton lycra. And the other view - with the gathers folded over. I discovered the sleeves for 2805 fit onto the 2806, how lovely. I will have to check out whether they are the same for 2804. I don't have any other Jalie tops.

Last one is actually a black and white stripe that sent my eyes funny when I was cutting it out. I guess it is tricking the camera now. This is actually 2805 but with the scoopneck shape from 2806. I loved the neckline so much.